Installing and Configuring Powermanager Extension
Scenario: You want to install and configure Powermanager extension.
The scenario describes steps for configuring Powermanager extension, where Desigo CC and Advanced Reporting extension are installed on the same Server.
You can install and configure Powermanager extension using the post installation steps or without configuring the post installation steps.
The following workflow describe steps for installing and configuring Powermanager without post installation steps. To configure Powermanager with post installation steps and a pre-configured backup project, see Post-installation Steps for Powermanager.
Reference: For background information, see reference section.
Workflow Diagram:
Prerequisites:
- IIS is installed and configured. See Install Internet Information Services (IIS) on different OS Types in Complete the Installation Planning Requirements
- The Powermanager extension and associated extensions are installed:
- Web Service Interface
- Advanced Reporting: Uninstall any older version of Advanced Reporting and Tomcat and then install and configure Advanced Reporting extension
- D3 Visualization
- Modbus
- (Optional and required only when you have IEC61850 devices) IEC61850 Power Devices
- SMC is launched. See Start the System Management Console (SMC) in Server Projects Configurations Procedures
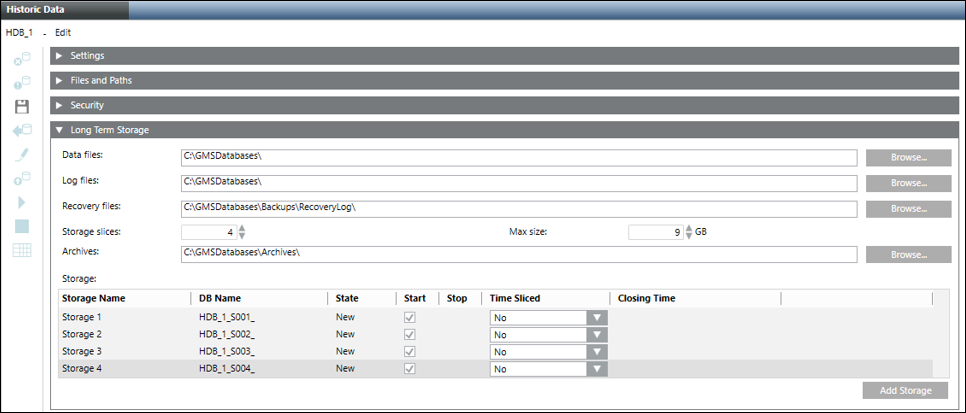
In SMC, you must configure two Long Term Storages (LTS) and link it to the Powermanager project that you create.
- Create database with two Long Term Storages in SMC.
a. Select History Infrastructure.
b. Click Scan Local.
c. Select the Required SQL server and click Link .
.
d. Click Add to create the HDB.
e. In the Long Term storage expander, click Add Storage two times to create two long term storages.
f. Select the Start check box for the two storages.
g. Click Save.
- Create a Powermanager project with required extensions WSI, Advanced Reporting, D3 Visualization, Modbus. Do one of the following:
- Click Create Project from Template
 to create a project using the template project settings.
- Click Create Project to create project and configure the project manually.
NOTE: Change the endianity configuration in the config file in the config folder located at
[installation drive:]\[installation folder:]\[Powermanager project name:]\
Set littleEndianRegister=0.
For example, for a Modbus driver with driver number 2, you must modify the config file as:
[mod_2]
littleEndianRegister=0
- Link the database with four LTS to the Powermanager project.
- The database is linked to the Powermanager project containing all required extensions of Powermanager.
In SMC under the Websites node create a website, WSI app, D3 Visualization app, and Advanced Reporting Application.
- Create Website by linking to the Powermanager project in SMC. (See Create a Website in Setting up the Web/Windows App Clients.)
- Create Web Services application.
- Create the D3 Visualization application.
- Create the Advanced Reporting Application. (See Create Advanced Reporting Application in Installing and Configuring Advanced Reporting.)
- Start, Activate the Powermanager project.
- Start the Desigo CC client. The user name for Desigo CC Client is set to defaultadmin and password is 1, reset the password on first logon and launch Desigo CC.
- You have logged into the Desigo CC client.
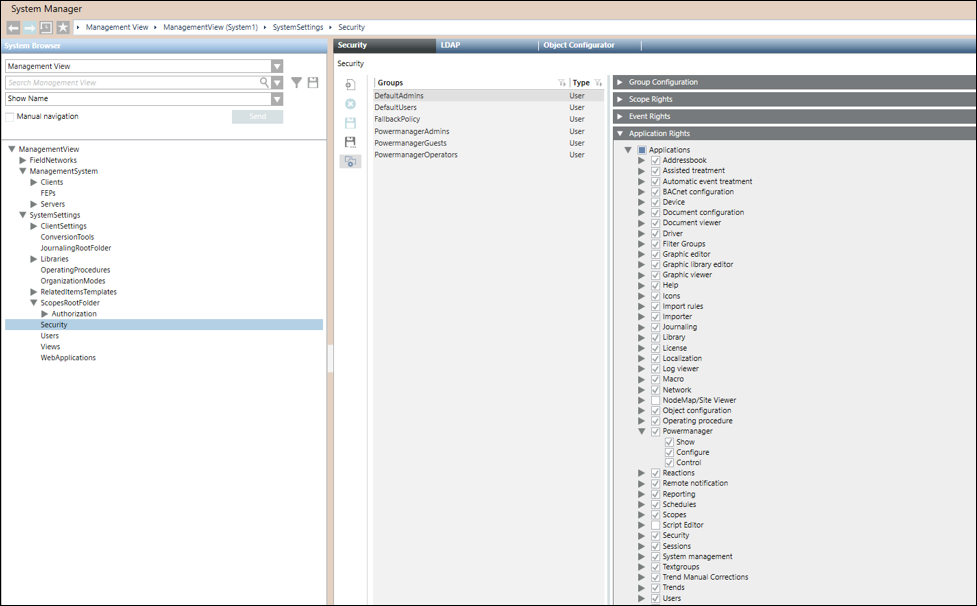
- Ensure that you have configured a user group and assigned Scope rights (See Assign Scope to a User Group in Security) and application rights (See Verify Powermanager Application Rights in Additional Powermanager Procedures) to the user group using the Security tab that displays when you select Project > System Settings > Security in the System Browser in the Engineering mode.
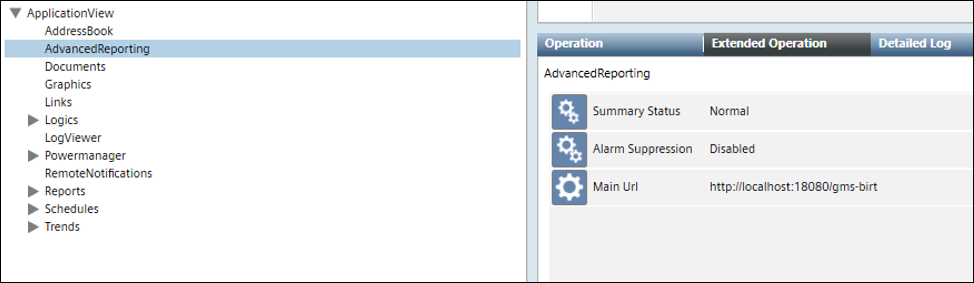
- To configure the Advanced Reporting Main URL for Powermanager do the following:
a. In System Browser, select Application View.
b. Select Applications > Advanced Reporting.
c. In the Extended Operation tab, in the Main URL Value text box, paste the copied https URL and click Set.
- The Main URL is configured for Advanced Reporting.
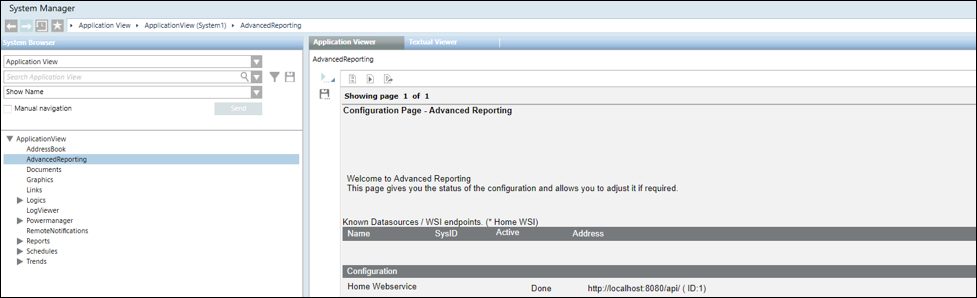
- To configure the URL for Web Services, do the following:
a. In the Configuration Page - Advanced Reporting, click Details adjacent to the Home Webservice.
b. Click Delete, and thereafter click Add.
c. In the Parameter dialog box for Web Services configuration that displays, paste the WSI URL. For example, URL: http://localhost:8080/api/.
NOTE: If IIS, Advanced Report (that is Tomcat server + gms-birt) and WSI are on the same machine then the default URL http://localhost:<WSIPort>/api can be used.
d. Click Execute.
- The Web Services URL displays with the status
Done.
- To perform the templates synchronization for Advanced Reporting, do the following:
a. In the Configuration Page - Advanced Reporting, click Details adjacent to Template Synchronization.
b. In the section now visible above, click Add.
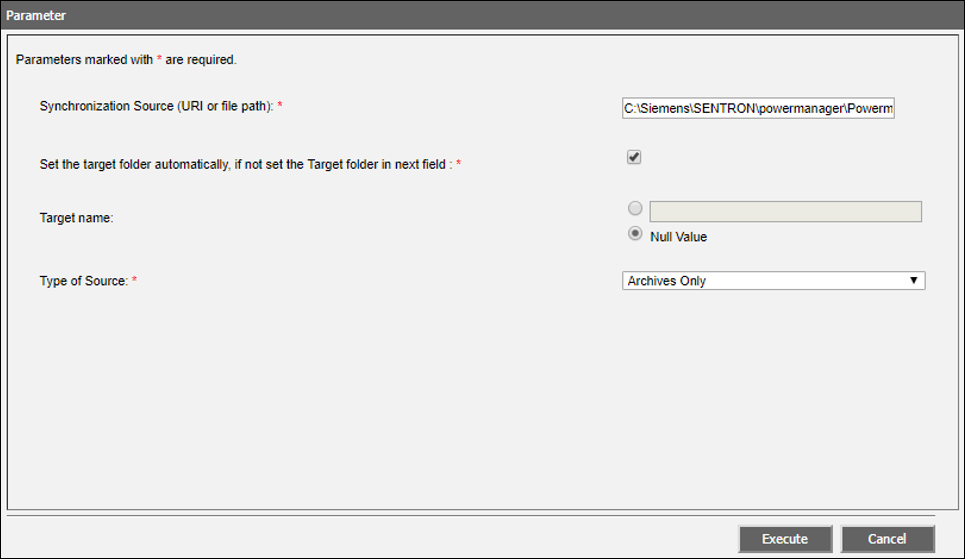
c. The Parameter dialog box for template synchronization displays.
d. In the Synchronization Source (URL or file path) field, enter the path to the libraries folder of your project. For example, [Installation Drive]:\[Installation Path:]\[Project Name]\libraries.
e. Ensure the Set the target folder automatically, if not set the Target folder in next field check box is selected to automatically set the ID of the system as the name of the folder where the advanced reporting templates will be extracted on the Tomcat server.
Alternatively, to manually enter the System ID, deselect the check box and then select the option button next to Target name and type the System ID.
f. In the Type of Source drop–down list, retain the default Archives Only.
g. Click Execute.
h. Click Synchronize.
- The Advanced Reporting templates are synchronized.
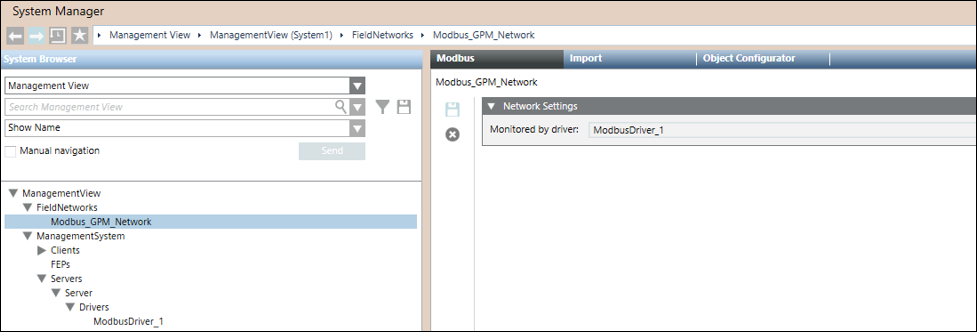
- Create and Start Modbus TCP Driver.
- Create the Modbus Network and associate it with the Modbus driver. (See Modbus).
- The Modbus network is associated with a Modbus driver.
- In SMC, D3 visualization web application is created and you have copied the URL.
- In System Manager, select Engineering mode.
- To configure the Dashboard URL for Powermanager:
a. Append /#/dashboard to the end of the copied URL in an editor such as Notepad++ .
b. Copy the modified URL.
c. In the System Browser, select Powermanager.
d. Paste the modified URL into the Dashboard URL field of the Main expander.
e. Click Save .
.
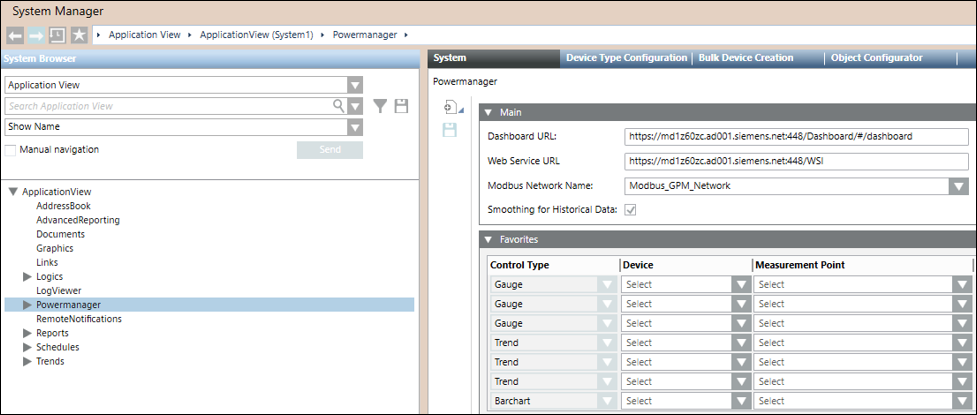
- Set the Modbus Network Name for Powermanager. Do the following:
a. In System Browser, select the Application View.
b. Select the Powermanager node.
c. In the Main expander select the name from the Modbus Network Name drop-down menu.
- The Modbus Network Name is set for Powermanager.
- Next, assign the storage groups to the created storages.
- You can now configure the supported devices and work with Powermanager.
